Hard Solder Challenge 2
I was discussing the hard solder challenge with some students in my Loveland Classroom and I decided to show them something about hard solder that I just could not do with using the step method or with all medium or all easy. I was also answering the questions posted to a Newsgroup. Here is the post:
"Ah, the voice of reason and good sense. Thank you. What a relief to read your post. As a silver
fabricator I find the idea of using just one solder temp when you have 3, ridiculous. You not only
are risking the metal but also your valuable time in making a piece. It's a hat trick. Yeah it can be
done. But why? For bragging rights? For ego? I don't have time to dork around with it. I need to
produce, not play with metal to see how far I can go before I cook my work or lose all the work
I've done before as it slides off."
First of using hard solder is no hat trick, even my beginning students use only hard solder for every solder joint on their first ring with over 20 solder joints. No hat trick just learning to use the torch. What is ridiculous is to think every thing will slide off or you will cook your work. Only too much heat in the wrong place can do that.
But why? Believe me it is not bragging rights, and not ego. You see, using only hard solder is easier to do than using the three solders. That is what most people who have not tried it, just can not understand. Here are my reasons for using only hard solder for all solder joints.
1. Hard solder actually becomes easier and quicker to use than the "step" method. No hat trick, just controlling your torch, all my students can do that easily with in the first 30 minutes of learning to light a torch. This includes junior high age students.
2. Hard solder does not pit as medium and easy do. ( I will soon be putting up some photos of the three. I have to get some of the easy and medium first. I have used any for nearly 20 years.
3. Hard solder polishes just like sterling, wears just like sterling, and tarnishes just like sterling, unlike easy and medium that begin to oxidize, tarnish faster than sterling. If you like unsightly darkened solder lines then use easy and medium.
4. Hard solder will not undercut as easy and medium solder will. I have had many repair jobs come in (when I did repairs for about 5 years) with solder lines on polished surfaces that were polish in to unsightly grooves. They tarnished, began to show, so they were polished and repolished to the point that the solder joints began to undercut, the solder eaten away. Then the sides of the sterling begin to get buffed and the result is a rounded groove where the joint is.
5. There are only three solder grades, some time in every piece you make, multi joints must be made with the same solder. All I am trying to teach is the more joints you make with hard solder the easier it is to do the piece. As soon as you begin to use medium or easy, you make it harder do make the next solder joint with out something bad happening. Doesn't this just make sense. If you use hard solder for nearly or all solder joints, it is actually easier to control the temperature of the piece and not harder.
6. The real proof that using only hard solder is easier to use, all my students use the $10.00 propane torch to learn with. Then as they sell jewelry and make a good profit, they can pay for a better torch.
7. It just makes pretty and better silver jewelry, with the whole piece polished to a high polish, even the solder joints.
8. Faster to use, which means to most fabricators, more profit! I teach my students they do not have time to dork around using three solders. I the time it takes to decide which one to use where, they can have it soldered and finished.
9. If a piece gets ran over by a car, the poor slob that must repair it, will not have fall completely apart as he, or she, heats it up. The piece will be easier to repair! That's a good thing, for the person doing the repairs and the customer!
Part One Of Hard Solder Challenge 2
I have given 9 good reasons to only use hard solder for every solder joint. Your challenge is to email me with three good reasons to use the step method. And I will not accept: not being able to use the torch, (controlling the heat), or I was taught that way, so I am going to keep doing that way, or even worse: I have taught it that way for years and I am going to continue to teach it that way. None of which are good reasons to me. Just three good reasons, that is all I ask!
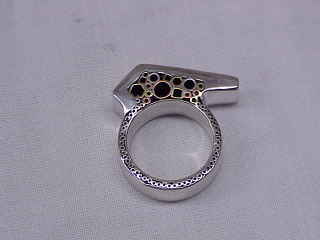
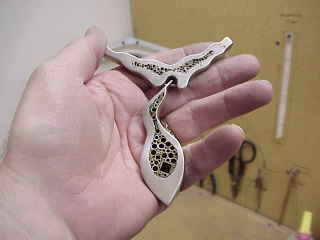
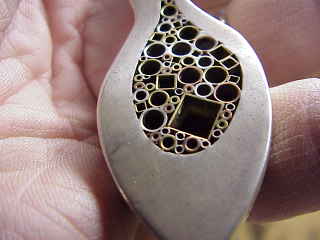
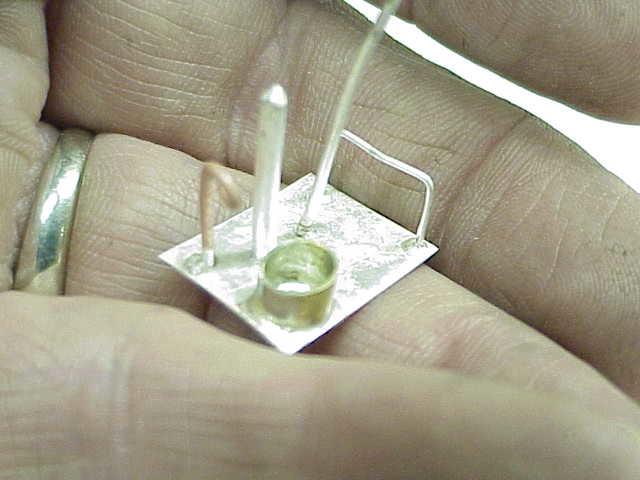
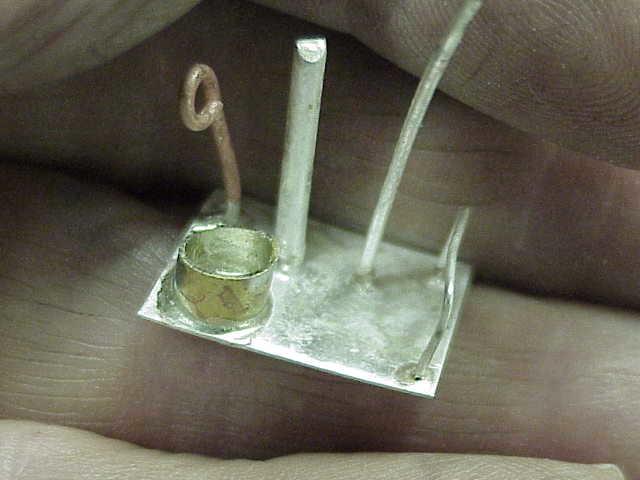
This challenge is not to see if you are good enough to reproduce these challenges! The challenge is can these pieces even be done using the "step" method. No not just using medium and easy for the last two solder joints. I challenge any one to reproduce the piece below by using hard solder for the first solder joint, and then medium for the next, and then easy for the rest. You can use any torch you wish.