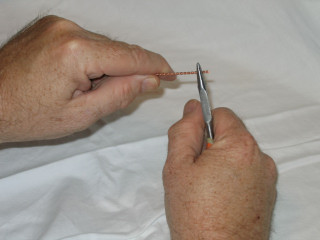
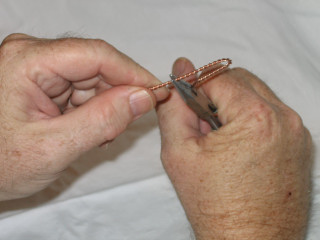
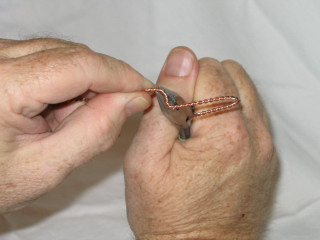
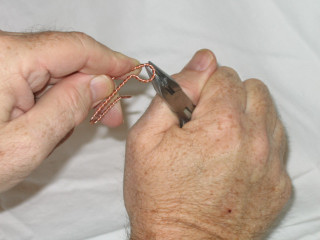
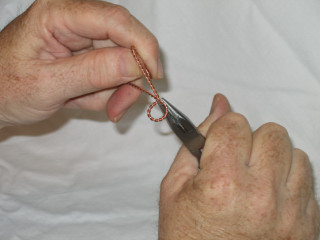
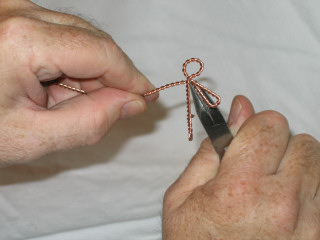
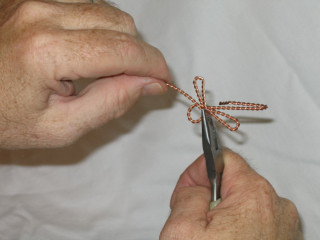
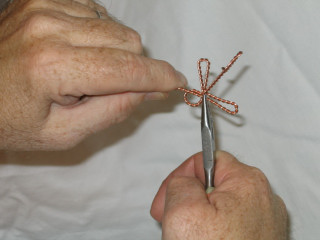
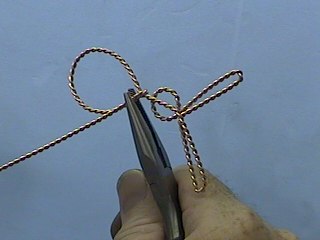
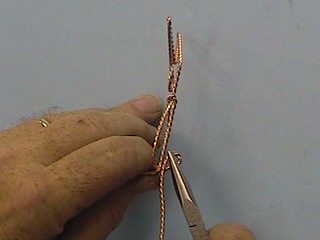
Begin by placing the pliers perpendicular to the wire, and about 1/4 inch from one end of the wire.
Bend the wire at an angle of 45 degrees, by turning your wrist slightly.
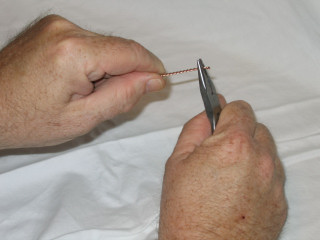
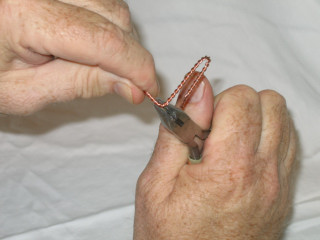
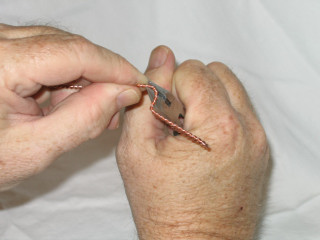
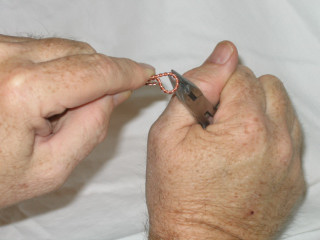
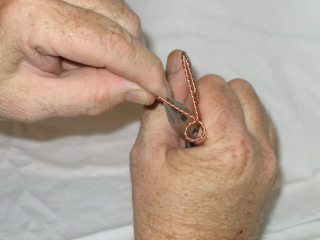
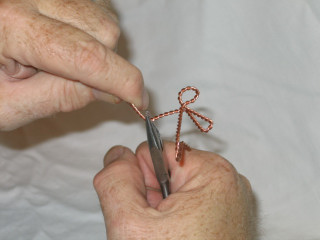
Grasp the wire at 1/2 inch furthur up the first bend. Remember to keep the pliers perpendicular to the wire.
Gently bend the wire in a curve around and back down toward the first bend.
The first step is to make the hook or hanger for the ornament.
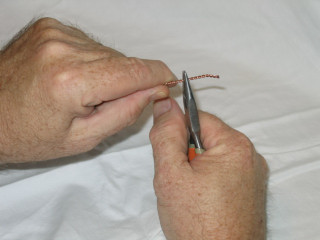
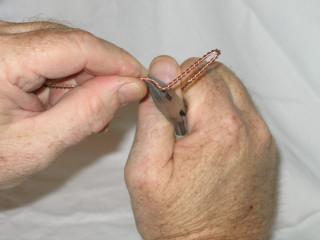
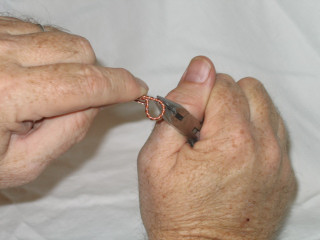
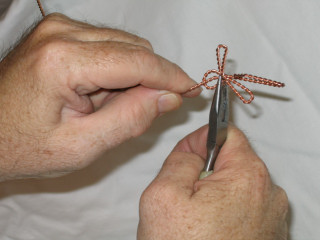
Complete the curve until the wire is now pointing straight and parallel with first part of the hook.
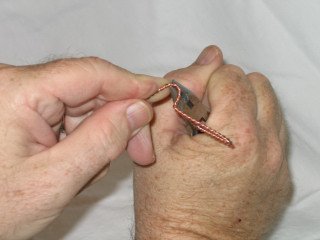
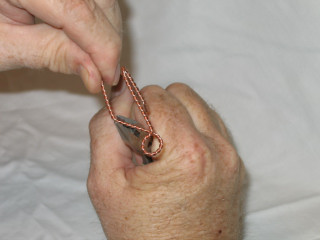
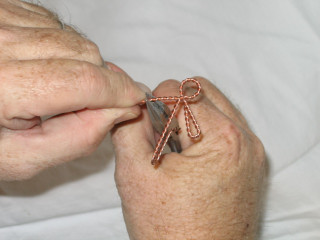
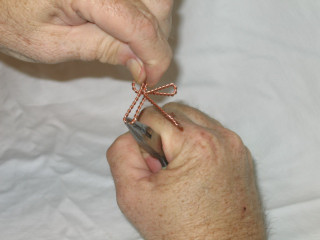
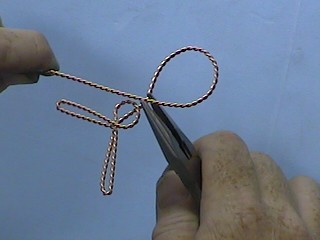
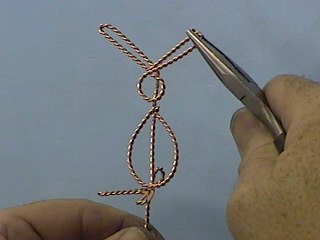
Grasp the wire right under the hook with the pliers parallel with the hook.
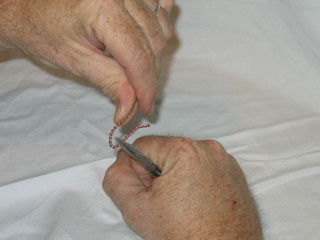
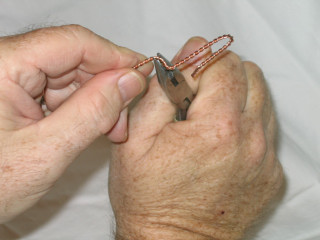
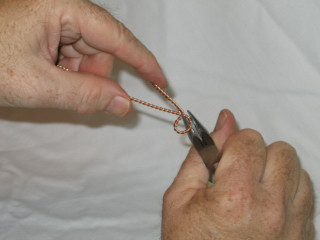
As with most bends, hold the pliers in this position and bend the wire by pushing the wire with you other hand in a right angle (90 degrees).
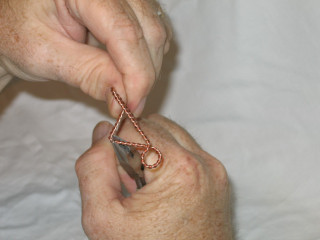
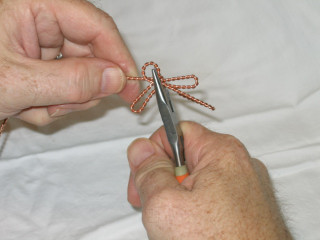
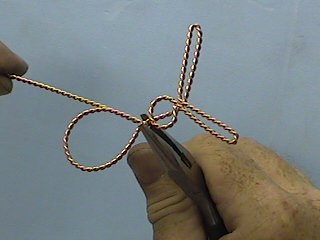
Grasp the wire right at the bend.
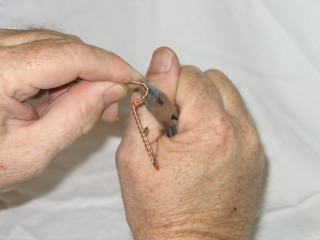
Start making the Bunny's round head by making a slight bend down. Circles are easily made by making a slight bend, moving the pliers slightly and repeating it.
Bunny Rabbit Ornament
This ornament can be used as a Christmas Tree Onament, an ornament for a package,
or as a sun catcher during the Easter Season.
If you wish you can eliminate the hook or hanger, and make this bunny into a plant stake.
Just start with a circle for the bunny's head, then the follow the instructions from that point.
Then do not cut off the excess wire so that it will form the plant stake.
For a real time video of Don Norris making the this sculpture/ornament please click on the "Video" button below.
Now you can purchase 12 Ornaments/Sculptures on one cd, complete with detailed photos and instructions as this Bunny Rabbit.
FREE BONUS: Each sculpture will be featured in it's own video so that you can see how Don Norris makes them in real time.
For ordering information please click on "Order Now" button below.
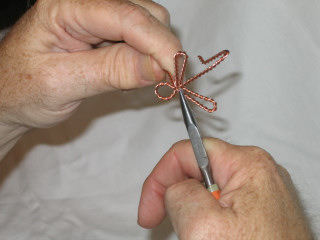
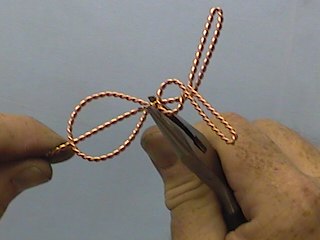
Move the pliers slightly. The important thing to making a circle is to move the pliers the same distance and make the same smll bend each time.
Move the pliers the same distance.
Make the same slight bend.
Make the same slight bend.
Move the pliers the same distance.
Move the pliers the same distance.
Make the same slight bend.
Make the same slight bend.
Move the pliers the same distance.
Make the same slight bend.
Move the pliers the same distance.
Move the pliers the same distance.
Yes, just keep repeating this same process over and over until you have a nice circle.
Make the same slight bend.
Move the pliers the same distance.
Make the same slight bend.
Move the pliers the same distance.
Be sure that the wire goes behind the hook as you begin to finish the circle.
Make the same slight bend.
If you find that you did not put the wire behind the hook, you should correct this mistake now, by simply pinching it and the hook.
Just push the wire so that it is behind the hook. It will spring back into place if you do this gently.
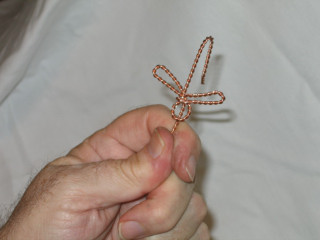
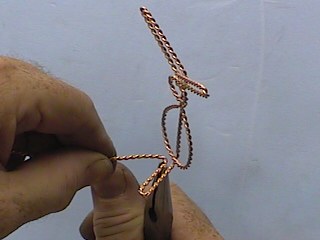
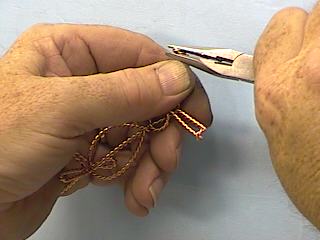
Finish the circle for the head.
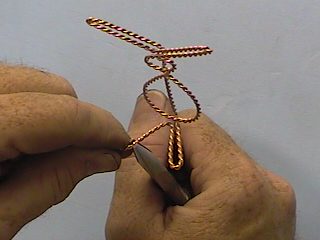
Bring the wire straight out to begin forming the left ear.
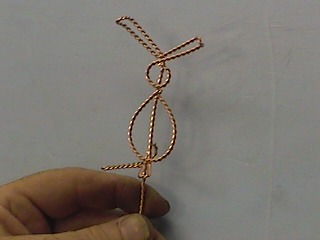
The next step is to make a circle for the Bunny's head.
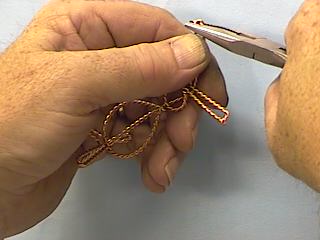
The next step is to make the Bunny's ears.
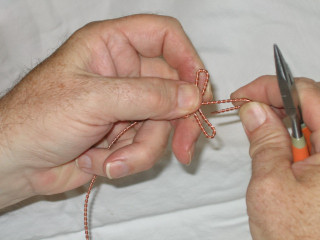
Grasp the wire at the top of the head, and straighten wire so that it is at an angle of 45 degrees to the hook..
Grasp the wire at about 1/2 inch above the head.
Start bending the wire around the pliers.
Grip the wire right after this bend.
This is the same as making a circle.
Bend the wire around the jaws again.
Grip the wire again right after the bend.
Continue to bend the wire around the jaws..
Grip the wire right after this bend.
Bend the wire until it touches the top of the head.
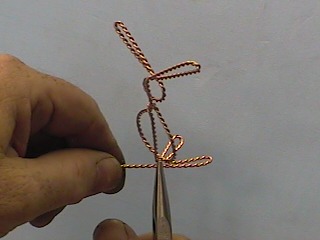
Turn the sculpture to make it easier to make the second ear. Grip the wire at the top of the Bunny's head.
Bend the wire up at the same angle as the first ear.
Make the second ear the same way as you did the first ear. Grip the wire about 1/2 inch above the head.
Just as the first ear, bend the wire around the jaw.
Grip the wire again.
Bend the wire around the pliers,again.
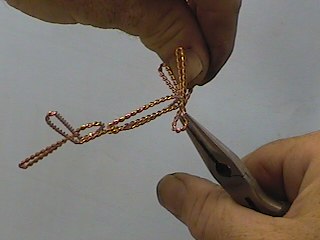
Bring the wire around and to the top of the head.
Grip the wire at the top of the head.
Keep the pliers at the same angle as the head and ears.
Grip the wire with your other hand as close to the pliers as you can, and adjust it so that it is tight against the back of the head.
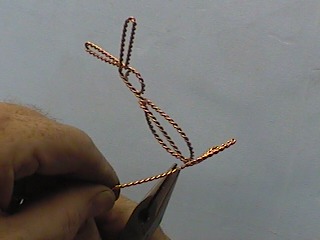
Grip the wire perpendicular to the head and ears.
Bend the wire straight down in back of the head.
It may be easier to grab the ears and the head at the same time to make this bend.
Pinch all the elements together so that they are flat.
It is a good time to straighten the hook.
Hold the head and ears tightly and straighten the hook, and make sure that it is at a 90 degree angle to the head.
The head and ears are finished. At least the hard part is done! From this point making the ornament is the same as making a plant stake.
Make a large curve for the body.
Grip the wire right below the head with the pliers behind the head and perpendicular to the head.
The next step is to make a circle for the Bunny's body.
Bend the wire all the way around to form a nice fat bunny. Gripe the wire right at the neck and bend the wire around the neck.
Pinch the wire tight around the neck.
Grip the wire behind the bunny and perpendicular to it.
Begin to bend the wire forward to make the bunny"s feet.
Grip the wire behind the bunny and perpendicular to it at the bottom of the bunny.
Bend the wire straight down through the body.
Grip the wire at the body.
Bend the wire around the jaws similar to the way we made the bunny's ear. Bring the wire all the way around and back to the body.
Bend the wire straight up and 90 degrees to the body.
Bring the wire back to the body and then grip it behind the bunny's body with the pliers straight up and down.
Grip the wire again and bend the wire around the jaws to make the second foot.
Bend the wire back to make the second foot.
Bend the wire around the jaws to make a small circle for the bunny's tail. Yes, it is a cotton tail. A copper cotton tail.
Grip the wire with the pliers perpendicular to the bunny.
Bend the wire at a 90 degree angle out behind the bunny.
Grip the tip of the ear.
Bend the tail so that it is at 90 degree angle out behind the bunny.
Grip the tail and pinch it together
Bend it forward.
Grip the tip of the other ear.
Bend the tip of the ear forward to give it a little character.
Your Bunny Rabbit is finished as a plant stake.
If you are making an ornament simply cut off the extra wire and you are finished.
Now you can purchase 12 Ornaments/Sculptures on one cd, complete with detailed photos and instructions as with this Bunny Rabbit.
FREE BONUS: Each sculpture will be featured in it's own video so that you can see how
Don Norris makes them in real time.
For ordering information please click on "Order Now" button below.
You can also see how I make this Bunny Rabbit Ornament in real time by video. Each sculpture on the CD will include a video of the sculpture being made by me.